Accessing DICOM Data
Imaging data stored on the CFMM DICOM server can be accessed in a number of ways.
Web app
CFMM DICOM Data Browser web application can be used to query and retrieve datasets.
Zip archive file structure
The DICOM files downloaded via the Data Browser are compressed into directories organized as follows:
{PatientName}/{StudyDescription}.{SeriesNumber}.{InstanceNumber}.{hash(SOPInstanceUID)}.dcm
These attributes originate from the DICOM header:
Attribute |
Tag |
|---|---|
PatientName |
(0010,0010) |
StudyDescription |
(0008,1030) |
SeriesNumber |
(0020,0011) |
InstanceNumber |
(0020,0013) |
SOPInstanceUID |
(0008,0018) |
DICOM Server (Query/Retrieve SCP)
Hostname |
dicom.cfmm.uwo.ca |
Port |
11112 |
Called AE title |
CFMM |
Authentication |
Western username/password |
Mac OS X Client (OsiriX/Horos)
DICOM clients such as OsiriX/Horos do not directly support username and password authentication when querying/retrieving studies.
DcmProxy
In order to connect to the CFMM DICOM server from OsiriX/Horos, you can use our DcmProxy OS X application.
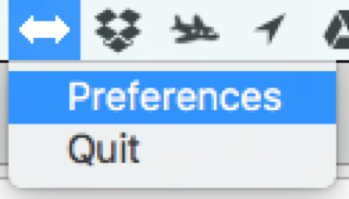
After DcmProxy is launched, a new item will appear in the status bar. Click on it and select Preferences to set up the proxy.
A Preferences window will pop up, which will allow you to set up:
Bind AddressandBind Porton which the proxy will listen for incoming connections.
DICOM ServerandDICOM Port, which should be set todicom.cfmm.uwo.caand11112to connect to the CFMM DICOM Server.
UsernameandPasswordwhere your Western credentials should be entered.
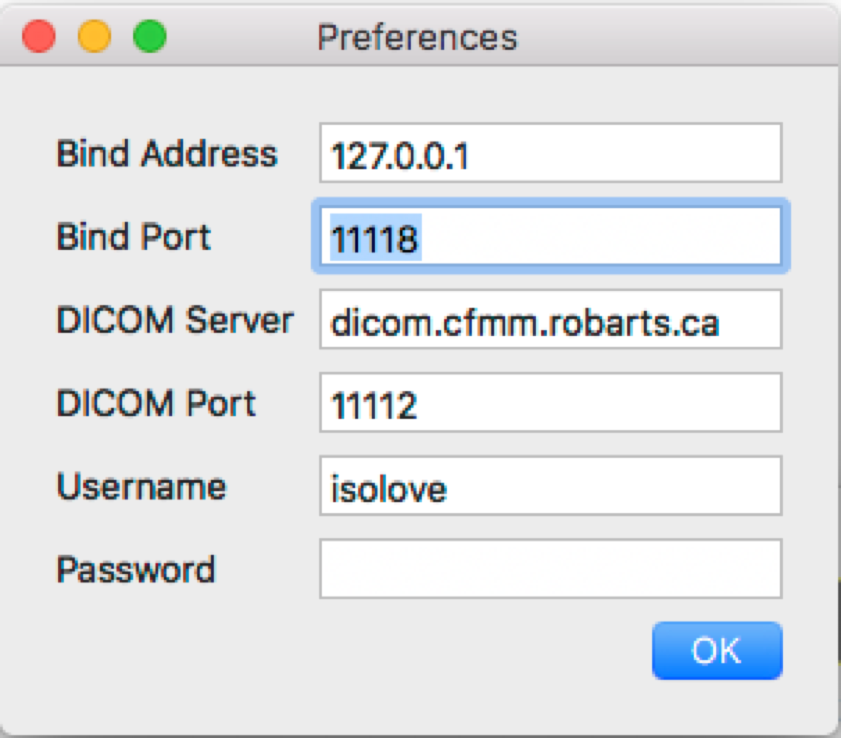
(Note: although displayed as empty after the first time the credentials are saved, the password is stored in the Mac OS Keychain).
Horos/OsiriX
In Horos/OsiriX, you need to add the bind address/port on which DcmProxy listens as a DICOM node.
Open the Preferences and select Locations.

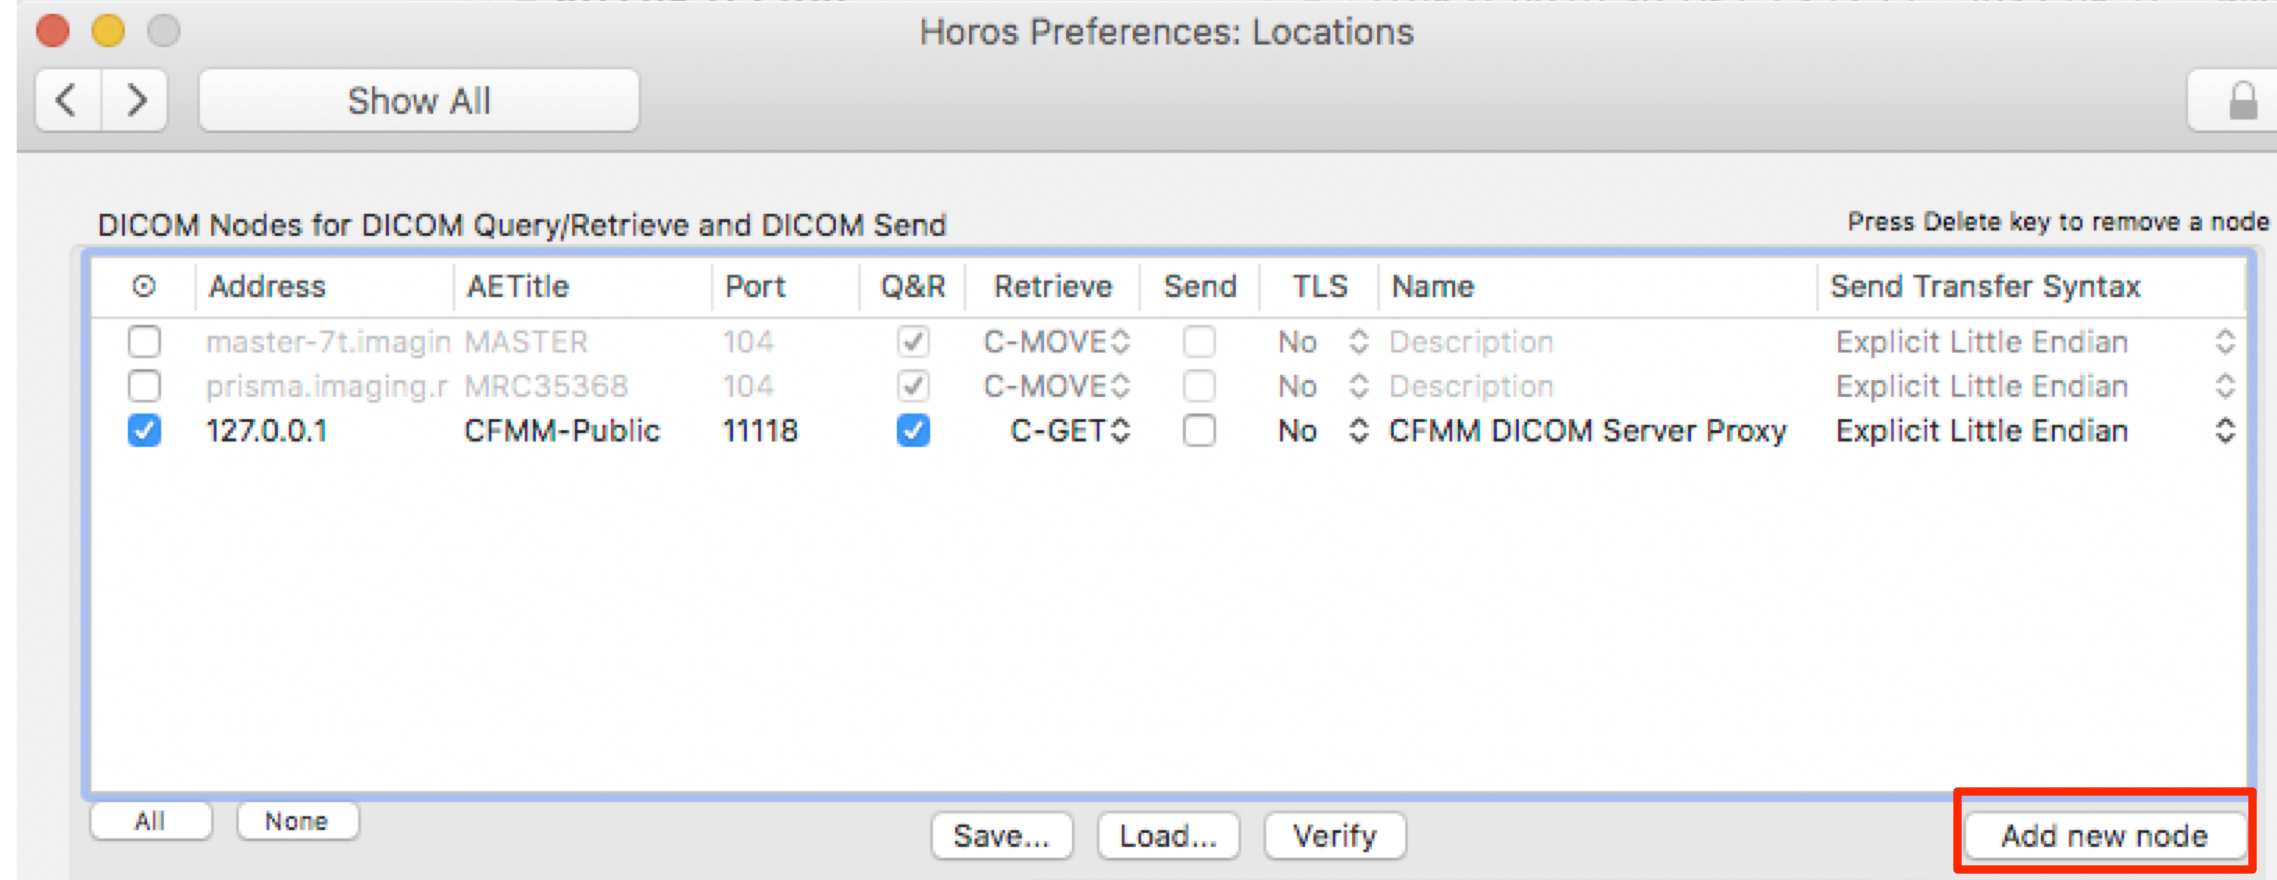
Use the Add new node button, and enter the proxy's Bind Address and Bind Port as Address and Port, CFMM-Public as the AETitle and use C-GET as the Retrieve method.
You also need to activate the Listener. Select the Listener preferences item.
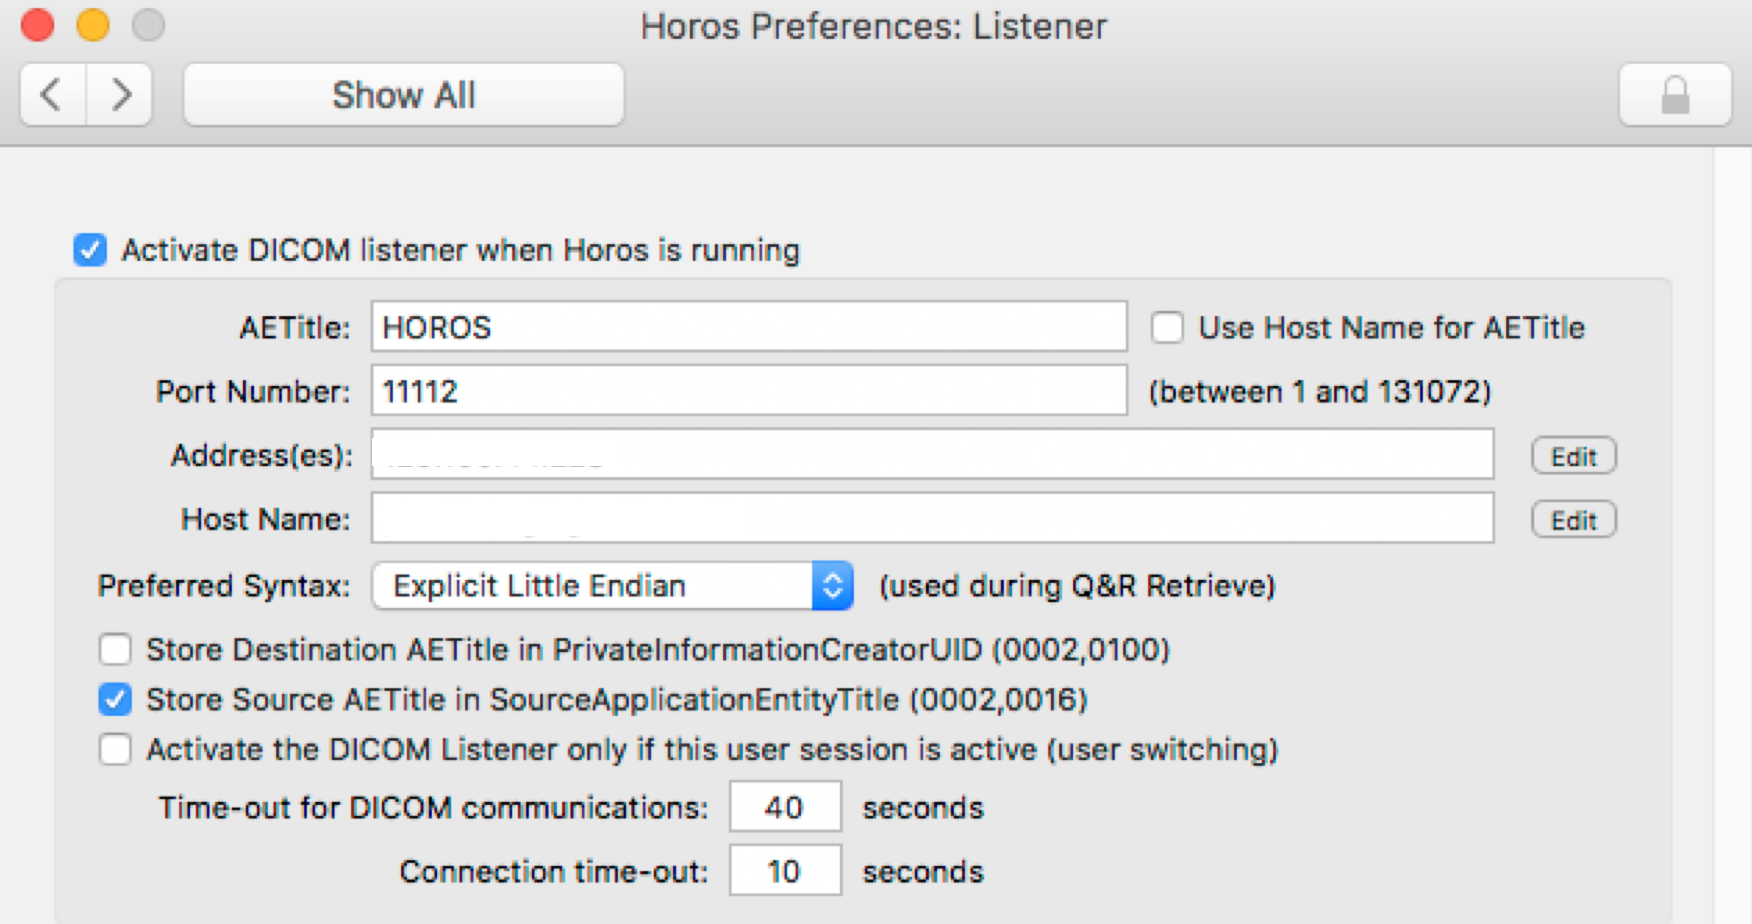
The Address(es) and Host Name fields will be auto-filled in with your machine's IP and Hostname. AE Title should be set to HOROS or OSIRIX.
You will now be able to query and retrieve data from the CFMM DICOM Server.